

A cluttered kitchen countertop makes cooking stressful, cleaning harder, and your kitchen look smaller than it actually is. The truth is that most kitchens don’t need more storage, they need better organization.
This step by step guide will help you create a clean, functional, and aesthetically pleasing countertop that stays organized permanently (not just for one day).
Step 1: Completely Clear Your Countertops
Before organizing, you must reset the space.
What to do
- Remove everything from the counter
- Deep clean and sanitize the surface
- Sort items into categories:
- Daily use
- Weekly use
- Rare use
- Decorative
- Daily use
You’ll instantly notice most countertop clutter comes from items that don’t belong there.
Golden Rule:
If you don’t use it every day, it probably shouldn’t live on the counter.
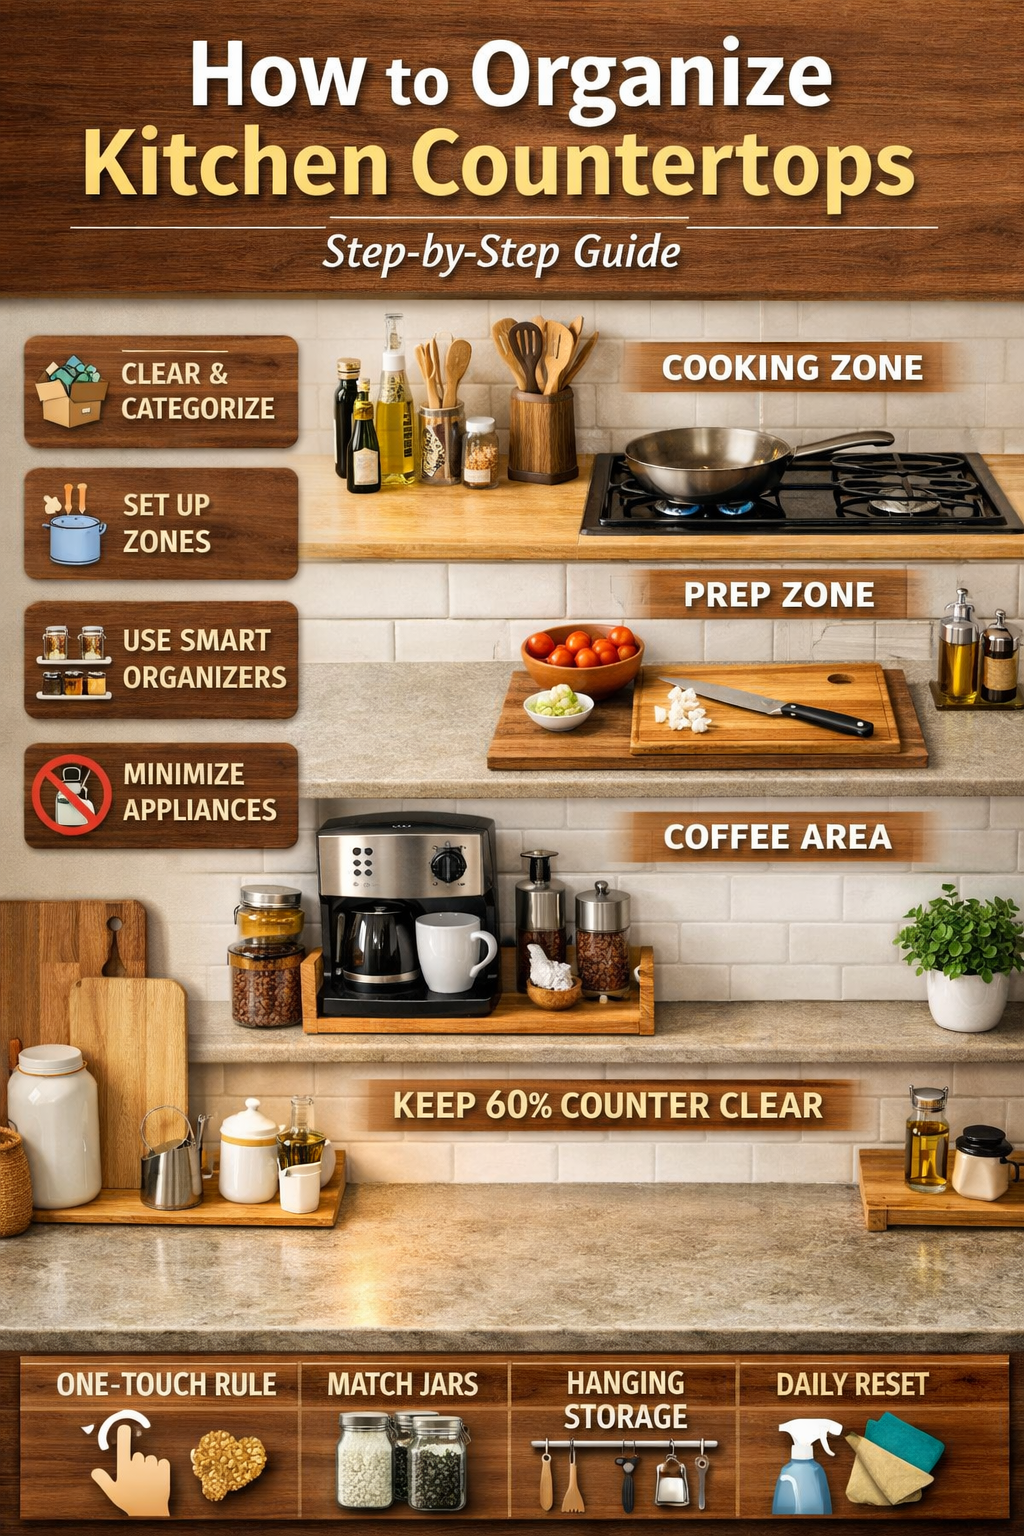
Step 2: Divide the Kitchen into Functional Zones
Professional kitchens are organized by workflow, not by where things randomly fit.
1. Cooking Zone (Near Stove)
Keep only cooking essentials:
- Cooking oil
- Salt & pepper
- Frequently used spices
- Spatula & ladle holder
2. Prep Zone (Main Workspace)
This should remain the most open area.
- Cutting board
- Knife block or magnetic strip
- Mixing bowls
- Paper towel holder
3. Cleaning Zone (Near Sink)
- Soap dispenser
- Sponge holder
- Dish brush
- Hand towel
4. Beverage Zone (Optional)
- Coffee machine
- Tea jars
- Mugs
- Sugar container
Result: You stop walking back and forth while cooking everything flows naturally.
Step 3: Apply the Countertop Essentials Only Rule
Your counter is a workspace, not a storage area.
Keep on Counter
✔ Daily appliances (kettle, coffee maker)
✔ Cooking tools used every day
✔ 1–2 decor items
Remove From Counter
✘ Grocery packets
✘ Rare appliances
✘ Duplicate tools
✘ Random containers
A clean kitchen usually has 50–70% empty countertop space.
Step 4: Use Smart Organizers (Not More Space)
You don’t need a bigger kitchen, you need vertical storage.
Use Vertical Space
- Wall shelves
- Hanging rails
- Magnetic knife strips
Group Items Together
Use trays to visually declutter:
- Coffee tray
- Oil & spice tray
- Cleaning tray
Small But Powerful Helpers
- Tiered racks
- Lazy Susan turntables
- Utensil holders
These reduce visual clutter instantly.
Step 5: Control Kitchen Appliances
Appliances create 80% of countertop mess.
Keep Outside Only If Used Daily
- Electric kettle
- Coffee machine
- Toaster (if used daily)
Store Away
- Mixer grinder
- Blender
- Food processor
- Sandwich maker
Pro Tip: Create an appliance parking cabinet with easy access but a hidden design.
Step 6: Follow the One Touch Rule
The habit that keeps kitchens permanently clean.
After using an item, return it immediately don’t place it temporarily.
Most clutter forms from “I’ll keep it here for now.”
Step 7: Create Visual Balance (Make It Look Expensive)
Organization is also about appearance.
- Use matching jars
- Stick to one color theme
- Group items in odd numbers (3 or 5)
- Leave breathing space between items
A minimal counter automatically looks premium.
Step 8: Daily & Weekly Maintenance Routine
Daily (2 Minutes)
- Wipe surfaces
- Put items back
- Clear sink area
Weekly (10 Minutes)
- Reorganize cooking area
- Throw expired items
- Clean corners
Monthly
- Remove unused items
- Rotate seasonal appliances
Consistency matters more than deep cleaning.
Tips for Small Kitchen Countertops
Small kitchens need strategy, not sacrifice.
- Use wall-mounted storage
- Choose foldable tools
- Prefer multi-purpose appliances
- Utilize corners with corner racks
Small kitchens look bigger when counters stay open.
Common Countertop Organization Mistakes
Avoid these and you win instantly:
- Keeping every appliance outside
- Mixing cleaning & cooking items
- Ignoring vertical space
- Over-decorating
- Storing groceries on counters
Final Thoughts
An organized countertop is not about perfection, it’s about systems.
Once everything has a fixed home:
- Cooking becomes faster
- Cleaning becomes easier
- Kitchen looks bigger
- Stress reduces